Overview
 |
| Finished Product |
Planning
I graduated from pencil and paper and taught myself how to use SketchUp. It wasn't too bad to learn, but definitely took some effort to become proficient. Once I had the basics down, creating plans for the herb ladder was pretty straightforward.
I only had a few requirements to work with, so I had a decent amount of freedom:
- It had to fit in the space we had picked out for it (within the footprint of the door and under the eave of the house)
- Rachael needed to reach all the boxes so it couldn't be too tall
With those requirements in mind, I figured out how wide the boxes could be, and then decided to make them detachable so any planting could be done away from the ladder itself (and allowed it to be a little taller than if the boxes were permanent).
 |
| Sketch Up Drawing |
Building
Getting the materials was very easy. It was made entirely from dimensional lumber 8ft long or less. I was able to cram all of it in my car, so no delivery required.
First, I cut everything for the boxes, including the rabbit cuts for the joinery. I did all of that with a circular saw and a miter saw. A router or table saw would've been much more effective, but I got the job done with what I had. It was tough to get the depth of the cuts right, and i could've assembled a better jig for the circular saw. It wasn't perfect, but everything fit together.
 |
| Making the Rabbit Cuts |
 |
| Completed Cut |
Next I assembled all 4 boxes. Everything was joined using wood glue only, which should be more than strong enough thanks to the rabbit joints. So far so good! It was tough with only two clamps, but it worked.
 |
| Four Assembled Boxes |
In between gluing each box, I used the downtime to make the cuts required for the legs. There is a notch for each box so it can be lifted out and tended to.
 |
| Cut Legs, Before Sanding |
After the glue dried, I sanded the living daylights out of each box. I was amazed at the way sanding was able to transform my shoddy craftsmanship into a significantly nicer piece. By sanding, I was able to turn cheap dimensional lumber into something that looked much higher quality. It was really nice to watch the sander erase all of the markings stamped on the wood and smooth out all the imperfections.
 |
| Box, After Sanding |
Once all the glue was dry, I put a waterproof finish on everything. It's the first time I've graduated to finishing a piece, so I hope it holds up to being outside. I think it came out really nice, but in the future, I think I'll stain before adding the finish if it's something that really needs to look good. For the herb ladder, it's more than good enough as is.
 |
| Top: Finished Boxes; Bottom: Unfinished Box |
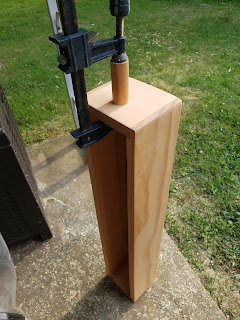
I had cut a few dowels and finished them at the same time, leaving a little unfinished space at the end where they would be glued. I drilled appropriately-sized holes in the side of each box and glued the dowels in place.
 |
| Gluing The Dowels |
With everything assembled, I could put it together and add additional support. I had two crosspieces left over from cutting the legs, and at this point, screwed them in place, using the boxes as a guide. The supports are the only pieces assembled with screws on the entire ladder.
The next step is to fill the boxes. We need to figure out what we want to put in it, but that should happen any day now...
Lessons Learned
- Make every effort to get the rabbit cuts as close to perfect as possible. I was able to fix a lot of mistakes by sanding, but would have saved a lot of time and effort if the cuts had been more accurate in the first place.
- Don't overlook the benefits of sanding, and make sure you are able to sand everything you need to. I was able to fix a lot of mistakes by sanding the piece, plus it just looks so much better. I did run into some problems - I didn't sand before assembling the boxes, so I couldn't get the palm sander inside the box. I could have hand sanded everything, but instead I chose to be lazy and left the insides of the boxes unsanded. They turned out fine, but in the future, sanding before assembling is definitely the way to go (at least for hard-to-reach spots).
- If you're wife shows you something on Pinterest to use as inspiration, the finished project is supposed to look exactly like the picture, no creative interpretation allowed. On several occasions, I heard, "oh, it's shorter than I expected, is that really how tall it's going to be?" I identify a lot with this video...
- Put a picture of the finished project at the top of the blog so the preview photo is better. I still haven't fixed my first blog (and probably never will), but this one is much better.